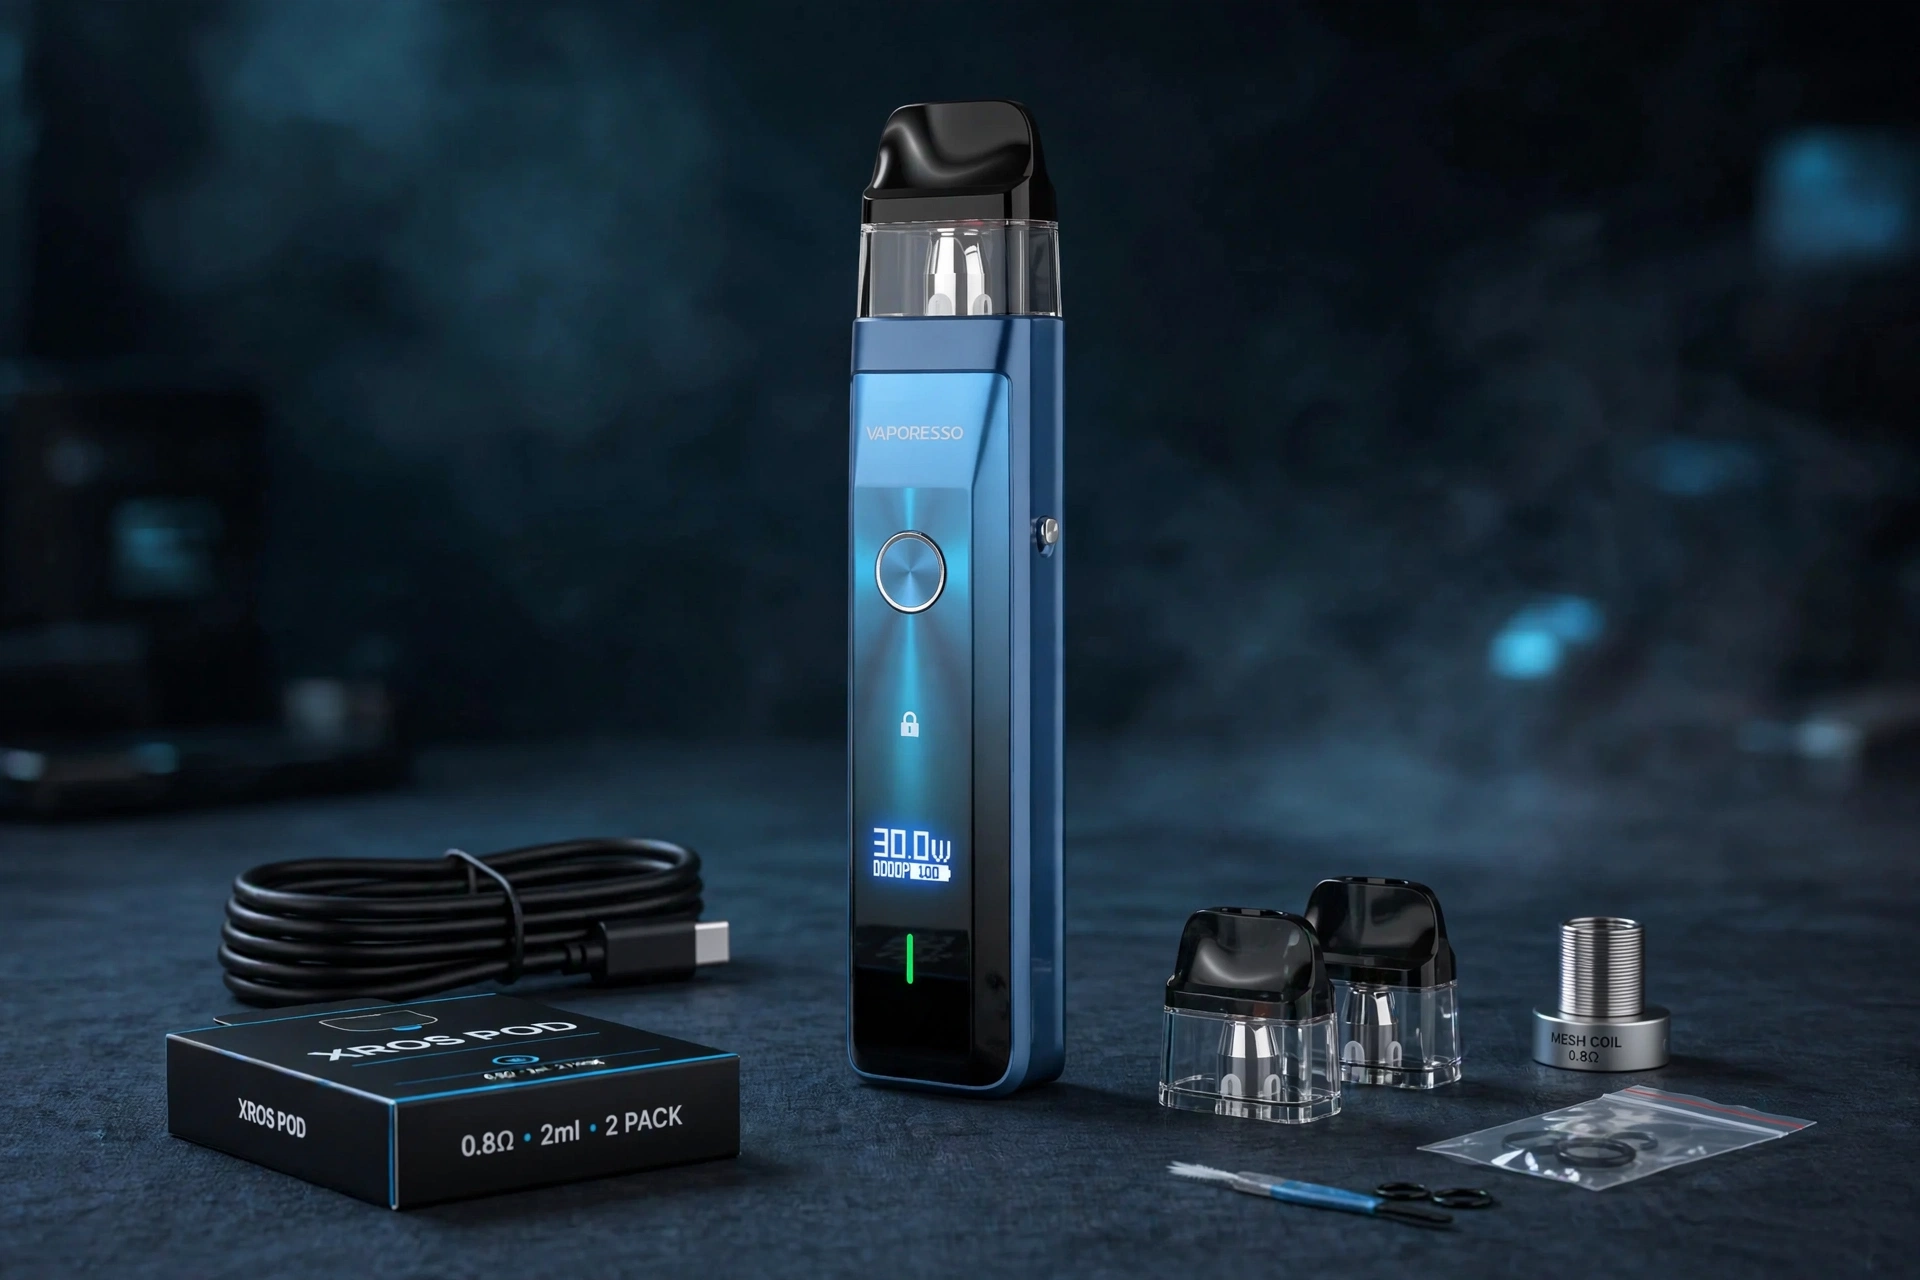
This Vaporesso XROS Pro Not Working guide starts with a refillable pod kit, and that refillable design is the key to most faults. You keep the battery device, you fill the pod yourself with bottled e-liquid, and you replace the whole pod when its built-in coil is worn out. It is not a sealed disposable that you throw away when it stops, and it is not a prefilled pod kit with a sealed pod to swap. A fault that looks like a dead device is often just a pod that is low on liquid, a wattage setting that does not match the pod, a device that is locked, or a battery that is flat even though the screen still lights up.
Each pod has its own coil built in, so a pod fault can also be a coil fault. If one pod tastes burnt and a fresh pod tastes clean, the device is fine and the first pod is finished. If every pod gives the same fault, the device, the battery, the wattage, or the liquid is the more likely cause. That simple test, one pod against another, settles most faults on this kit before any replacement is needed.
Jump to Section
Vaporesso XROS Pro at a Glance: The First XROS With a Screen
Adjustable Wattage, Power Modes, and the Smart Display
Vaporesso XROS Pro Problems in One Quick Look
Fixing the Vaporesso XROS Pro, One Problem at a Time
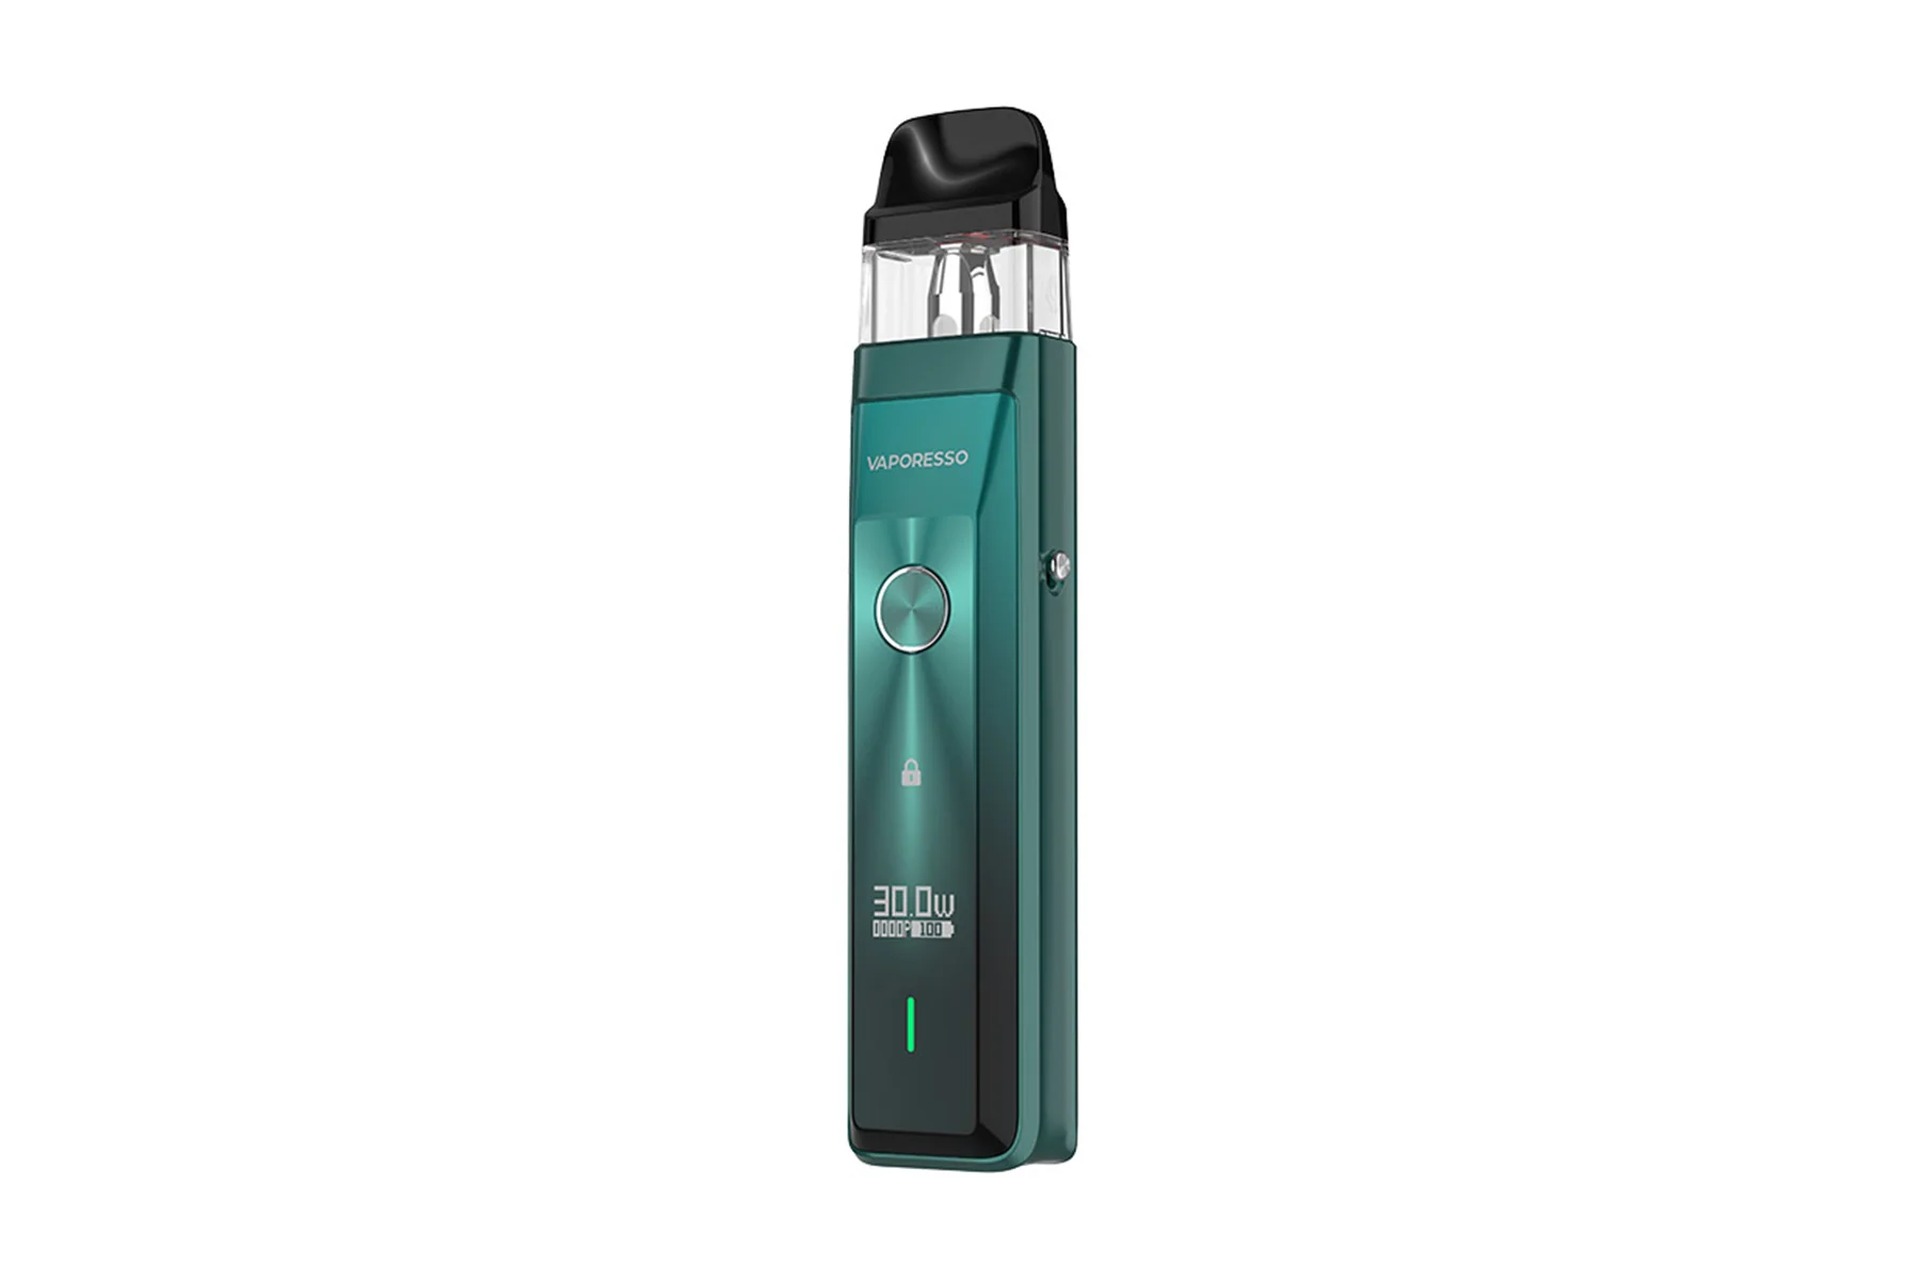
Vaporesso XROS Pro at a Glance: The First XROS With a Screen
| Entity / feature | What it is on the kit |
|---|---|
| Brand | Vaporesso |
| Product | Vaporesso XROS Pro pod kit, also written as Vaporesso Xros Pro in some listings |
| Device type | Refillable pod kit, NOT a sealed disposable, NOT a prefilled pod kit |
| Puff rating | No puff rating, because the kit is refillable and the pod is refilled by the user |
| Battery | 1200mAh built-in, rechargeable by USB-C, see the battery note below |
| Power | 5 to 30W adjustable with the 0.4 ohm pod, see the wattage note below |
| Pod capacity | 2ml in the UK TPD version, top fill |
| Included pods | 2 x XROS pods with built-in mesh coil, see the box note below |
| Pod range | 0.4, 0.6, 0.8, 1.0 and 1.2 ohm XROS pods, see the pod note below |
| Coil | Mesh coil built into each pod, not replaceable on its own, replace the whole pod when the coil is worn |
| Liquid | Bottled e-liquid chosen by the user, nic salt or freebase, 50/50 VG/PG best, see the liquid note below |
| Firing | Draw-activated and button firing, see the firing note below |
| Draw style | Mouth to lung (MTL) and restricted direct to lung (RDL), airflow slider at the back |
| Display | Smart display for wattage, puff count, and battery level, see the screen note below |
| Lock | Side lock button for the fire button, auto-draw still works when locked |
| Size and weight | About 119.7 x 24.4 x 18.45mm, about 86g, see the size note below |
| TPD position | 2ml pod within the UK pod limit, nicotine in liquid capped at 20mg per ml in the UK |
Battery: full charge in about 35 minutes in WizVape and other listings, with USB-C at 2A. VapeSuperstore gives 1A charging in its listing. This guide uses 2A as the working figure and keeps the 1A figure visible here, because the listings disagree.
Wattage: adjustable from 5 to 30W with the 0.4 ohm pod. With higher resistance pods the screen shows ECO, Normal, or Power mode instead of adjustable wattage. One listing gives 11 to 30W, which is the range by pod, not a different kit.
Pod: 0.4 ohm 25W, 0.6 ohm 21W, 0.8 ohm 16W, 1.0 ohm 12W, 1.2 ohm 10W in the Vape Lounge listing. The 0.4 and 0.6 ohm pods suit direct to lung, and the 0.8, 1.0, and 1.2 ohm pods suit mouth to lung.
Liquid: use 50/50 VG/PG for MTL pods. Liquid at 70/30 and thicker wicks slowly on MTL pods and causes dry hits. Nicotine in liquid is capped at 20mg per ml in the UK.
Firing: draw firing and button firing both work. The side lock button locks the fire button only, and auto-draw still works when it is locked, so a locked device can still fire on a draw.
Screen: first XROS pod system with a display screen. It shows wattage, puff count, and battery level with the 0.4 ohm pod. One listing gives a 0.42-inch OLED screen, and one gives a TFT display. This guide uses 0.42-inch OLED as the working figure.
Size: most listings give 119.7 x 24.4 x 18.45mm. WizVape gives 120 x 24 x 18mm in its features table. This guide uses the detailed figure and keeps the rounded figure visible here.
Box: WizVape lists the box as the device, one 0.6 ohm pod, one 0.8 ohm pod, one USB-C cable, and a user manual. Other listings list two 0.4 ohm pods in the box. This guide uses the WizVape box and keeps the other box visible here, because the listings disagree.
Do not confuse with the XROS Pro 2 (2000mAh, 0.96-inch colour screen) or the XROS 5 (1500mAh, 0.88-inch screen). Do not confuse with the XROS 4 or XROS 3, which have no screen and no adjustable wattage.
Adjustable Wattage, Power Modes, and the Smart Display
Check the wattage, the pod, and the lock before you assume a flavour or vapour fault. On this kit, the wattage, the pod, and the lock work as one system, so a locked fire button can look like a dead device, and a wattage fault can look like a pod fault.
How Wattage Works by Pod
The wattage is adjustable only with the 0.4 ohm pod, from 5 to 30W. Press the fire button 3 times to open wattage adjustment, set the wattage, then press the fire button once to save it. With the 0.6, 0.8, 1.0, and 1.2 ohm pods, the screen shows ECO, Normal, or Power mode instead, and you pick a mode rather than a wattage number. A pod run above its range burns fast, and a pod run below its range gives weak vapour and muted flavour. If you change pods, check the screen, because the wattage or mode should change with the pod. Start at the lower end of the range for that pod and turn the wattage up to taste, rather than jumping straight to the top.
To fill a new pod, remove the mouthpiece at the top of the pod, find the fill port with the red underlay, fill the pod with bottled liquid, reattach the mouthpiece until it clicks, and wait before the first draw. WizVape says to let the pod sit upright for five minutes after filling, so the coil can saturate fully and avoid a dry hit. A pod used straight away, with no wait for the liquid to reach the coil, can taste burnt, because liquid has not reached the coil evenly.
Reading the Smart Display
The smart display shows the wattage, the puff count, and the battery level with the 0.4 ohm pod, and ECO, Normal, or Power mode with the other pods. The display is the main way to read the wattage and the battery, and the clear pod is the main way to read the liquid level. A display that lights up on a draw is enough to show the device is firing, and a display that stays dark after a full charge is a fault sign. Do not judge the liquid level by the display alone, because the display shows battery, wattage, and puff count, not liquid.
If the display lights up on a draw and the device gives vapour, the fault was not the battery. If the display stays dark after a full charge and a fresh pod test, the device needs replacement, not repeated refitting. Where the display shows a low battery, charge the device fully before you judge any other fault, because a low battery can look like a pod fault, a flavour fault, and a vapour fault all at once.
Vaporesso XROS Pro Problems in One Quick Look
| Problem | First thing to check |
|---|---|
| Not charging | USB-C cable, adapter, port, display, damage |
| Burnt taste | Liquid, pod age, wattage, draw speed, new pod rest |
| Weak vapour | Battery, liquid, pod age, wattage, draw length |
| Not firing / pod not detected | Lock, pod seating, contacts, battery, firing mode |
| Flashing / screen trouble | Battery, pod seating, contacts, damage, display |
| Leaking / gurgling | Pod seating, mouthpiece, liquid level, draw strength |
| Flavour fading | Liquid, pod age, wattage, draw speed, try another pod |
| Fast battery drain | Draw length and frequency, wattage, charging habits, pod age, device age |
| Tight draw | Airflow slider, blocked inlets, pod seating, condensation |
| Auto-firing / getting hot | Stop using it at once, do not charge or reuse it |
Fixing the Vaporesso XROS Pro, One Problem at a Time
The kit can stop hitting, fail to charge, leak, flash, or taste burnt when a pod, the contacts, the liquid level, the battery, the wattage, or the airflow has a problem. Basic checks can help identify the cause before a pod or device replacement is needed.
Basic pod check, do this first for any problem below, unless that section tells you to stop for safety: Make sure the side lock is off, so the fire button works. Make sure the pod is fully pushed in place, with no gap and no wobble. This is also how to use the kit correctly for the first time, and how to replace a pod correctly. Check that the mouthpiece is fully clicked on, check the liquid level in the pod and top it up if it is below the coil, check that the wattage or mode matches the pod resistance, wipe the pod contacts and the device contacts with a dry tissue, check the display on a draw, charge the device fully, and give a new pod five minutes after a fresh fill before the first draw so the liquid can reach the coil. If you have a fresh replacement pod, test with it. If a fresh pod works and the old pod does not, the old pod is finished, even if the device is fine. On a new pod, remove the mouthpiece, fill the pod, reattach the mouthpiece until it clicks, wait five minutes, and start at the lower end of the wattage range for that pod.
If you also use the Luxe XR kit, see the Vaporesso Luxe XR Not Working guide.
1. Vaporesso XROS Pro Not Charging
Not charging is when the device shows no sign on charge, or the battery does not last, even though it is plugged in. A charging fault is often a cable or port fault, not a dead battery on its own.
Common Causes
A weak or damaged USB-C cable, a weak wall adapter, or a laptop port that does not give enough power can all cause not charging. Lint or dust in the charging port can block the cable, and a cable that is not pushed fully in can also fail to charge. A battery that is very flat can take a short time before the display shows on charge, so a charge judged in the first minute can look like a fault. A device with port damage, or with liquid in the port, can also fail to charge.
How to Fix
Use a trusted USB-C cable you know works, and a trusted wall adapter, and plug the device in directly from a wall socket, not from a weak laptop port. This is how to charge the kit correctly, and it is the first fix for not charging. Push the cable fully into the port, check for lint or dust with a dry tissue, and look for the display on charge. Leave the device on charge and check again after a short time, rather than judging it in the first minute. Try one different trusted cable and one different trusted adapter, and if a cable works for another device but not for this kit, change the cable and the adapter together, not just one of them. The cable is listed in the WizVape box list, as set out in the box note above, so a trusted cable you already own is the right cable to test with. A full charge takes about 35 minutes in the WizVape figure, so judge charging by vapour and by the display, not by the clock alone.
When to Replace
Replace the cable and adapter first if the device charges with a different cable and adapter. Replace the device if it will not charge with a trusted cable and adapter, a clean port, and a full charge time, and the display shows no sign on charge.
For King’s College London’s view on the vaping evidence, including that e-cigarettes offer a substantially less harmful alternative to smoking, but are not risk-free, see King’s College London.
2. Burnt Taste From the Vaporesso XROS Pro
Burnt taste is when vapour tastes harsh, dry, or like burnt cotton, even though the device still fires. Burnt taste is a sign that the coil is dry or worn, not a sign that the device needs a stronger draw.
Common Causes
A pod low on liquid, or a pod run with liquid below the coil, leaves the coil dry, and a dry coil burns on a draw. A new pod used straight away, with no five minute rest before the first draw, can also taste burnt, because liquid has not reached the coil evenly. A wattage set above the range for the pod burns the coil fast, and hard, long draws, one after another with no gap, can dry the coil faster than liquid can reach it. A pod that has been used for many days gives burnt taste as the coil and wick wear, even if liquid is still present. Thick liquid at 70/30 VG/PG and above can also cause burnt taste, because it wicks too slowly for these pods.
How to Fix
Check the liquid level first, then top the pod up with 50/50 liquid and close the mouthpiece fully. Give a new pod five minutes after a fresh fill, so the liquid can reach the coil and vapour is not burnt from a dry start. Turn the wattage down to the lower end of the range for that pod, or pick ECO mode with a higher resistance pod, and take slow, steady draws, with a gap between draws, rather than hard pulls one after another. If burnt taste stays after a rest, a top-up, and slow draws at the correct wattage, the problem is the pod, not the draw.
When to Replace
Replace the pod if the burnt taste stays after a liquid check, a rest, a wattage check, and slow draws, and the pod has low liquid or many days on it. Do not keep using a pod that tastes burnt, because a burnt coil will not recover. Replace the device if a fresh pod tastes burnt straight away, after a five minute rest and slow draws at the correct wattage, with a full battery and a fully pushed-in pod.
3. Weak Vapour From the Vaporesso XROS Pro
Weak vapour is when you get a thin draw, a small cloud, or a flavour that seems far away, even though the device still fires. Weak vapour is often a liquid, battery, or wattage fault, not a broken device on its own.
Common Causes
A pod low on liquid gives thin vapour first, then almost nothing. A pod that has been used for many days, or that has been in the device for a long time, gives weak vapour as the coil and wick wear. A battery low on charge gives weak vapour, because the coil does not heat fully. A wattage set too low for the pod also gives weak vapour, because the coil is not heated enough for that resistance. A pod not fully pushed in place can also give weak vapour, because the device cannot read the pod fully.
How to Fix
Charge the device fully, then check the liquid level in the pod and top it up if it is low. Remove the pod, wipe the contacts with a dry tissue, push the pod back in until it clicks, and test again. Check the wattage on the display and turn it up inside the range for that pod, because a 0.4 ohm pod at 10W will give weak vapour by design. Take a slow, steady mouth to lung draw, or a slow restricted direct to lung draw if you use a 0.4 ohm pod. Give a new pod five minutes after a fresh fill before the first draw, so the liquid can reach the coil and vapour is not weak from a dry start. This weak vapour fault is the same fault people describe as not hitting. If weak vapour stays on a fresh pod, the problem is not the old pod alone. Check the airflow slider as well, because a slider closed too far gives a thin draw.
When to Replace
Replace the pod if weak vapour stays after a full charge, a full refit, a liquid top-up, and a wattage check, and the pod has low liquid or many days on it. Replace the device if weak vapour stays on a fresh pod, with a full battery, the correct wattage for that pod, and a clean, fully pushed-in pod.
4. Vaporesso XROS Pro Not Firing or Pod Not Detected
Not firing is when you draw and get nothing, or the device seems dead even though it charges. A pod not detected fault often shows by a complete lack of vapour, with no display and no vapour on a draw.
Common Causes
A side lock left on will stop the fire button, and that is the most common cause on this kit, even though auto-draw still works when locked. A pod not fully pushed in place gives poor contact, so the device cannot detect the pod. Dirty contacts, condensation on the contacts, or a damaged pod can also cause a pod not detected fault. A battery that is very flat can leave the device dead on a draw, even if it shows a little life on charge. A mouthpiece not clicked on fully can leak liquid into the connection, and a pod with liquid below the coil can also fail to fire cleanly.
How to Fix
Slide the side lock off, then charge the device fully, remove the pod, and wipe the contacts with a dry tissue. Check that the mouthpiece is fully clicked on, then push the pod back in until it clicks, with no gap and no wobble. Take a slow, steady draw, and check if the display lights up and vapour follows. Try button firing as well as draw firing, because the kit supports both, and see if one works when the other does not. Test with a fresh pod if you have one, because a fresh pod test settles a pod detection fault fast.
When to Replace
Replace the pod if the device fires with a fresh pod, but not with the old pod, after a full charge, a clean refit, and a lock check. Replace the device if it will not fire with a fresh pod, a full battery, and clean contacts, by draw or by button, after the lock is off.
5. Vaporesso XROS Pro Flashing or Screen Trouble
Flashing is when the display blinks, shows a warning, or goes out, even though the device still charges. On this kit, flashing means the smart display, because the kit has a display for wattage, puff count, and battery level in the listings checked.
Common Causes
A battery low on charge can cause flashing or a low battery warning from the display, and a battery that is very flat can leave the display out. A pod not fully pushed in place gives poor contact, so the device cannot read the pod, and the display can flash or stay out. Dirty contacts, condensation on the contacts, or a damaged pod can also cause flashing. A device that has been dropped, or that shows damage, can flash even with a full battery and a fresh pod.
How to Fix
Charge the device fully with a trusted USB-C cable and adapter, and check the display again after a full charge. Remove the pod, wipe the contacts with a dry tissue, push the pod back in until it clicks, and take a slow, steady draw. See if the display lights up on a puff and the device gives vapour. If the display clears after a full charge and a clean refit, the fault was battery level or pod seating, not a broken display.
When to Replace
Replace the pod if flashing or screen trouble clears with a fresh pod, after a full charge and a clean refit. Replace the device if flashing or no display stays with a fresh pod, a full battery, and clean contacts, or if the device shows damage.
6. Vaporesso XROS Pro Leaking or Gurgling
Leaking is when liquid appears outside the pod, on the device, or on your hands, and gurgling is when the draw sounds wet and vapour feels thin. A little condensation in the mouthpiece is not the same as a leak, and a hard pull can make both worse.
Common Causes
A pod not fully pushed in place, or a mouthpiece not clicked on fully, can leave a gap where liquid escapes. A damaged pod seal, or a pod that has been refitted many times, can also leak. Overfilling the pod past the top can push liquid out, and hard pulls pull liquid into the mouthpiece faster than the coil can heat it, and that liquid shows as gurgling. A device kept upside down for a long time, or in a hot pocket or bag, can also cause leaking, because heat and pressure push liquid out of the pod.
How to Fix
Remove the pod and wipe the pod, the device, and the mouthpiece with a dry tissue. Click the mouthpiece fully onto the pod, push the pod back in until it clicks, with no gap and no wobble, and check the liquid level is not above the fill line. Take slow, steady draws, rather than hard pulls, and keep the device upright when it is not being filled. This leaking and gurgling fault is the same fault people describe as leaking. If the mouthpiece has condensation, wipe it dry and test again with a slow draw. Do not keep using a pod that leaks heavily, even if it still gives vapour.
When to Replace
Replace the pod if leaking or gurgling stays after a clean refit, a mouthpiece check, and slow draws, and the pod seal shows damage. Replace the device if a fresh pod leaks in the same way, with a fully pushed-in pod, a clicked-on mouthpiece, and slow draws, and the device contacts or pod bay show damage.
7. Flavour Fading From the Vaporesso XROS Pro
Flavour fading is when taste gets weaker over time, even though the device still fires and still gives vapour. Flavour fading is different from a burnt taste, because vapour still feels smooth, only the taste is faint. On this kit, flavour fading in one pod only is a pod fault, not a device fault, because each pod holds its own coil and its own fill of liquid.
Common Causes
A pod that has been used for many days gives fading flavour as the coil and wick wear, even if liquid is still present. A pod low on liquid gives fading flavour first, then weak vapour, then almost nothing. A wattage set too low for the pod can also dull flavour, because the coil does not heat enough for that resistance. Long, hard draws can also dull flavour faster, because the coil heats more than it needs to for a normal draw. A pod that has been in the device for a long time can also give fading flavour, even if it has not been used heavily.
How to Fix
Charge the device fully, then check the liquid level in the pod and top it up if it is low. Remove the pod, wipe the contacts, and push the pod back in until it clicks, with no gap and no wobble. Check the wattage on the display and turn it up inside the range for that pod, then take slow, steady draws, with a gap between draws, and see if flavour returns on a fresh draw. If flavour stays faint in one pod, try another pod, because a pod that tastes full proves the device is fine and the first pod is finished. This flavour fading fault is the same fault people describe as flavour going flat, and a pod that tastes different after a refill is normal on this kit, because each fill holds the liquid you chose.
When to Replace
Replace the pod if flavour fading stays after a full charge, a liquid top-up, a wattage check, and a refit, and the pod has many days on it. Replace the device if flavour fading stays on a fresh pod, with a full battery, the correct wattage for that pod, and a clean, fully pushed-in pod, and the other pods in the kit taste faint in the same way.
8. Fast Battery Drain on the Vaporesso XROS Pro
Fast battery drain is when the battery runs out much sooner than expected, even though the device still charges. A battery that drops in a few draws is a different fault from normal use over a day.
Common Causes
Long or frequent draws use more battery than short, occasional draws, and a higher wattage uses more power than a lower wattage, so a kit left at 30W will drain faster than the same kit at 12W. A battery that is charged with a weak adapter, or that is topped up for a few minutes at a time, can show a full level that falls fast. A pod that is worn, or that gives weak vapour, can make a user draw harder and longer, which uses more battery. A device that is older, or that has been charged many times, can also hold less charge than a new device.
How to Fix
Charge the device fully with a trusted wall adapter, and avoid judging battery life from a short top up. Turn the wattage down inside the range for that pod and check battery life over a day, rather than after a few draws, because a high wattage will drain the battery faster by design. Take slow, steady draws, with a gap between draws, and check the pod age and liquid level, because a worn pod can make you draw more. Clean the contacts and refit the pod, so the device does not waste power on a poor connection. The kit uses a 1200mAh battery in its own listings, and heavy use will drain it faster than light use, because 1200mAh is a small battery for a 30W kit.
When to Replace
Replace the pod if battery drain stays fast on a fresh pod, with a full charge and normal draws at the correct wattage, and the old pod was worn or low on liquid. Replace the device if battery drain stays fast on a fresh pod, with a full charge from a trusted adapter, clean contacts, and normal draws at the correct wattage, and the battery runs out much sooner than expected.
9. Tight Draw From the Vaporesso XROS Pro
Tight draw is when you have to pull hard to get vapour, or you get almost nothing even though the device still fires. This kit is a mouth to lung and restricted direct to lung device with an airflow slider, so the draw is restricted by design, but a draw that gets much tighter than normal is a fault.
Common Causes
Blocked airflow inlets, lint or dust in the inlets, or condensation in the mouthpiece can make the draw feel tight. The airflow slider moved too far closed can also make the draw feel tight, and a pod not fully pushed in place can block the draw. A pod low on liquid, or a pod that has been used for many days, can give a tight, weak draw. A battery low on charge can also give a weak, tight feeling draw, because the coil does not heat fully.
How to Fix
Remove the pod and check the airflow inlets for lint, dust, or liquid, and wipe them with a dry tissue. Move the airflow slider open a little and test again, then set it to the draw you want. Check that the mouthpiece is fully clicked on, push the pod back in until it clicks, wipe the mouthpiece and the pod contacts, and take a slow, steady draw, rather than a hard pull. If the draw stays tight, check the battery level and the liquid level, because a low battery and a low pod can also give a weak, tight feeling draw.
When to Replace
Replace the pod if the draw stays tight after cleaning, slider checks, and a full refit. Replace the device if the draw stays tight on a fresh pod, with clean inlets, the slider open, and a fully pushed-in pod.
10. Vaporesso XROS Pro Auto-Firing or Getting Hot
Auto-firing is when the device fires on its own, without a draw, or keeps firing after you stop drawing. Getting hot is when the device feels hot in a pocket, in a bag, or without use. This section is stop and replace only, with no fix steps that keep a faulty device in use.
Common Causes
Liquid in the pod bay, a damaged pod, or a device that has been dropped can cause auto-firing, because the draw sensor or the pod connection no longer reads correctly. Heat in a pocket or bag, or a device left in direct sunlight, can also make a device feel hot, and a device that fires on its own will also get hot from repeated firing.
How to Fix
Stop using the device at once. Do not charge it, do not draw from it, and do not try to fix it by removing and refitting pods, wiping contacts, or changing anything else. Keep it away from flammable material, and do not put it in a pocket or bag again. If it feels very hot, swollen, or smells of burning plastic, keep it away from people and pets, and follow local electronic waste rules for a damaged device.
When to Replace
Replace the device at once if it fires on its own, keeps firing after you stop drawing, or gets hot without use. Do not reuse the device, even if it stops firing for a short time, because the fault can return without warning.
FAQS (FREQUENTLY ASKED QUESTIONS)
Why is the Vaporesso XROS Pro not hitting after charging?
Check the battery level on the display, then check the side lock, pod seating, contacts, wattage, and liquid level. A full charge does not help if the fire button is locked, if the pod is not pushed in place, if the wattage is set too low for the pod, or if the pod is low on liquid. This is the answer for not hitting after charging. Slide the side lock off, charge fully, wipe the contacts, push the pod in until it clicks, check the wattage matches the pod, top the pod up, and test with a fresh replacement pod if you have one.
Why is the Vaporesso XROS Pro not hitting after fitting a new pod?
Remove the mouthpiece, fill the pod, reattach the mouthpiece until it clicks, push the pod in until it clicks, and wait five minutes for the liquid to reach the coil before the first draw. Start at the lower end of the wattage range for that pod, then turn it up to taste. A pod that is not pushed in place, or that has not had time to prime, will not hit even if the battery is full.
How do you set up the Vaporesso XROS Pro?
Unbox the device and take the pods out of the packaging. Remove the mouthpiece on the pod, fill the pod with bottled liquid, reattach the mouthpiece until it clicks, push the pod into the device until it clicks, wait five minutes, slide the side lock off, then inhale or press the fire button. Check the display, because the wattage or mode should match that pod, and turn it up or down inside the range for that pod to taste.
How do you change the pod on the Vaporesso XROS Pro?
Pull the old pod out of the device. Remove the mouthpiece on the new pod, fill the pod with bottled liquid, reattach the mouthpiece until it clicks, push the pod in until it clicks, with no gap and no wobble, wait five minutes before the first draw, then take a slow, steady draw. To change flavour, fill a fresh pod with a different liquid, because each pod holds the liquid you put in it.
Can you refill the Vaporesso XROS Pro pods?
Yes. This kit is a refillable pod kit, not a sealed disposable and not a prefilled pod kit. Remove the mouthpiece, fill the pod with bottled e-liquid through the port with the red underlay, and reattach the mouthpiece until it clicks. When a pod tastes burnt or gives weak flavour after many days, replace it with a fresh XROS pod in the same resistance. Never try to change the coil on its own, because the coil is built into the pod.
How long does it take to charge the Vaporesso XROS Pro?
The listings checked give a full charge in about 35 minutes with USB-C at 2A. Use a trusted USB-C cable and a trusted wall adapter, and charge until the display shows a full battery, or until vapour returns on a draw. Judge charging by vapour and by the display, not by the clock alone.
How many puffs does the Vaporesso XROS Pro give?
The Vaporesso XROS Pro gives no puff rating in the listings checked, because it is a refillable kit and the pod is refilled by the user. The display shows a puff count, but that count is a record of draws taken, not a limit on the kit. A pod that gives weak flavour or burnt taste is finished, because coil wear and liquid level matter more than any puff number alone.
What pods work with the Vaporesso XROS Pro?
Only XROS pods in 0.4, 0.6, 0.8, 1.0, and 1.2 ohm, also sold as XROS Pro pods in some listings. Pods for other brands do not fit this device in the same way, and forcing a wrong pod can damage the connection and cause leaking. Check the pod name before you buy, and note that the 0.4 ohm pod gives adjustable wattage, while the other pods give ECO, Normal, or Power mode instead.
Is the Vaporesso XROS Pro the same as the Vaporesso XROS Pro 2?
No. The XROS Pro 2 is a different kit with a 2000mAh battery and a 0.96-inch colour screen. The Vaporesso XROS Pro has a 1200mAh battery, up to 30W, and a 0.42-inch OLED screen. This guide is written for the XROS Pro name and its own listings, and it keeps the two kits separate, because the battery and the screen are different.
How should you store the Vaporesso XROS Pro?
Store the device upright, in a cool, dry place, away from direct sunlight, heat, and water, and out of reach of children. Keep it out of a pocket or bag where the device can be damaged. Dispose of used pods and a finished device under local electronic waste rules, not in normal household waste.